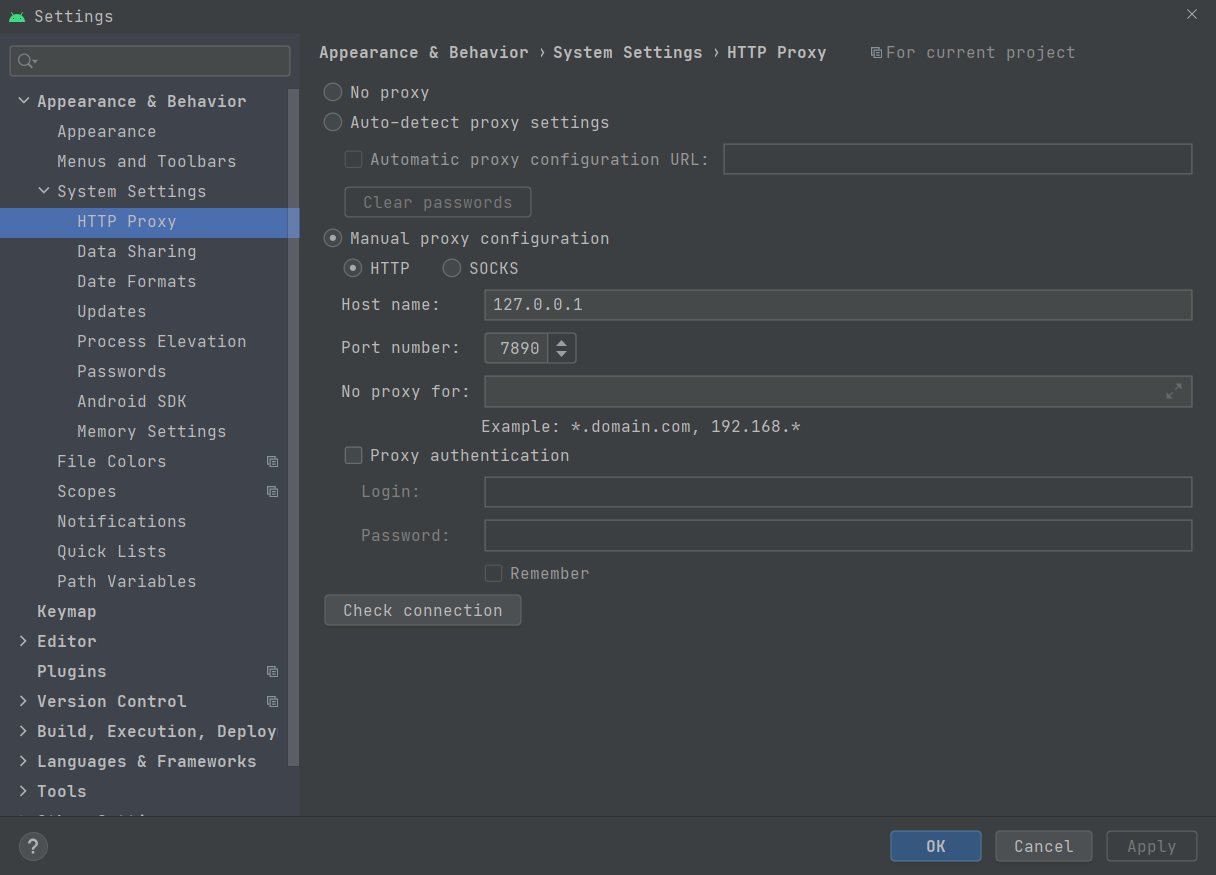
1
2
3
4
5
6
7
8
9
10
11
12
13
14
15
16
17
18
19
20
21
22
23
24
25
26
27
28
29
30
31
32
33
34
35
36
37
38
39
40
41
42
43
44
45
46
47
48
49
50
51
52
53
54
55
56
57
58
59
60
61
62
63
64
65
66
67
68
69
70
71
72
73
74
75
76
77
78
79
80
81
82
83
84
85
86
87
88
89
90
91
92
93
94
95
96
97
98
99
100
101
102
103
104
105
106
107
108
109
110
111
112
113
114
115
116
117
118
119
120
121
122
123
124
125
126
127
128
129
130
131
132
133
134
135
136
137
138
139
140
141
142
143
144
145
146
147
148
149
150
151
152
153
154
| import android.app.Activity
import android.content.Context
import android.content.res.Resources
import android.media.AudioManager
import android.os.Bundle
import android.os.Handler
import android.os.Looper
import android.util.Log
import android.util.TypedValue
import android.view.Gravity
import android.view.KeyEvent
import android.view.WindowManager
import android.widget.ProgressBar
import androidx.appcompat.app.AlertDialog
class VolumeDialog(activity: Activity) : AlertDialog(activity, R.style.VolumeDialog) {
companion object {
private const val TAG = "VolumeDialog"
@JvmStatic
fun show(activity: Activity) {
activity.let {
if (activity.isFinishing) return
VolumeDialog(activity).show()
}
}
}
private val volumeAudioManager = context.getSystemService(Context.AUDIO_SERVICE) as AudioManager
private var volume = volumeAudioManager.getStreamVolume(AudioManager.STREAM_MUSIC)
private val maxVolume = volumeAudioManager.getStreamMaxVolume(AudioManager.STREAM_MUSIC)
private val step = (maxVolume / 10).coerceAtLeast(1)
private val delayMillis = 1500L
override fun onCreate(savedInstanceState: Bundle?) {
super.onCreate(savedInstanceState)
setContentView(R.layout.dialog_volume_progress)
window?.setFlags(
WindowManager.LayoutParams.FLAG_NOT_TOUCH_MODAL,
WindowManager.LayoutParams.FLAG_NOT_TOUCH_MODAL
)
window?.setFlags(
WindowManager.LayoutParams.FLAG_WATCH_OUTSIDE_TOUCH,
WindowManager.LayoutParams.FLAG_WATCH_OUTSIDE_TOUCH
)
val attrs = window?.attributes
attrs?.apply {
gravity = Gravity.TOP
height = WindowManager.LayoutParams.WRAP_CONTENT
width = WindowManager.LayoutParams.MATCH_PARENT
y = TypedValue.applyDimension(
TypedValue.COMPLEX_UNIT_DIP,
35f,
Resources.getSystem().displayMetrics
).toInt()
}
Log.d(TAG, "onCreate() called with: attrs = $attrs")
window?.attributes = attrs
setCanceledOnTouchOutside(false)
initView()
}
private var volumeProgressView: VolumeProgressView? = null
private var progressBar: ProgressBar? = null
private val _handler = Handler(Looper.getMainLooper())
private val r = Runnable {
try {
dismiss()
} catch (e: Exception) {
e.printStackTrace()
}
}
override fun dismiss() {
_handler.removeCallbacks(r)
super.dismiss()
}
private fun initView() {
Log.d(TAG, "initView: ")
volumeProgressView = findViewById(R.id.vpv_volume)
progressBar = findViewById(R.id.pb_volume)
refreshProgress(volume * 1f / maxVolume)
setOnKeyListener { _, keyCode, event ->
Log.d(TAG, "setOnKeyListener: keyCode = $keyCode, event = $event")
if (keyCode == KeyEvent.KEYCODE_VOLUME_UP || keyCode == KeyEvent.KEYCODE_VOLUME_DOWN) {
handleKeyEvent(keyCode, event)
true
} else {
false
}
}
}
private fun refreshProgress(volumePercent: Float) {
_handler.removeCallbacks(r)
volumeProgressView?.setProgress(volumePercent)
progressBar?.progress = (volumePercent * 1000).toInt()
_handler.postDelayed(r, delayMillis)
}
private fun handleKeyEvent(keyCode: Int, event: KeyEvent): Boolean {
Log.d(TAG, "handleKeyEvent: volume = $volume, maxVolume = $maxVolume, step = $step")
if ((keyCode != KeyEvent.KEYCODE_VOLUME_UP && keyCode != KeyEvent.KEYCODE_VOLUME_DOWN) || event.action != KeyEvent.ACTION_DOWN) return false
volume = if (keyCode == KeyEvent.KEYCODE_VOLUME_UP) {
if (volume == maxVolume) return true
maxVolume.coerceAtMost(volume + step)
} else {
if (volume == 0) return true
0.coerceAtLeast(volume - step)
}
val volumePercent = volume * 1f / maxVolume
refreshProgress(volumePercent)
volumeAudioManager.setStreamVolume(AudioManager.STREAM_MUSIC, volume, 0)
Log.d(TAG, "handleKeyEvent: AudioManager set volume = $volume done.")
return true
}
override fun onKeyDown(keyCode: Int, event: KeyEvent): Boolean {
Log.d(TAG, "onKeyDown() called with: keyCode = $keyCode, event = $event")
return if (keyCode == KeyEvent.KEYCODE_VOLUME_UP || keyCode == KeyEvent.KEYCODE_VOLUME_DOWN) {
handleKeyEvent(keyCode, event)
return true
} else {
super.onKeyDown(keyCode, event)
}
}
}
|
